Summary:
In this user guide, you will learn what the work page contains, how it is structured, and how to navigate to other parts of the solution. You will learn how to select the correct type of registration (documentation or inspection), and how to choose a work mode – 3D model, Camera, or Video. The user guide is designed for users working on the project site, especially those who will actively use the app to document, inspect, or follow up on construction or civil engineering projects using the model, camera, and video.
Once you have logged in and selected a project, you will arrive at the work page. This is where you work in the project – here you can view the model and create new registrations (from the model or camera). Below is a simple explanation of the main parts of the work page and how you navigate to the different main sections.
The following are described:
1.0 Menu and Project Selection (top)
1.1 Menu Button (three lines, top left)
1.2 Project Name (top center, e.g., “Capture”)
1.3 List View (icon top right)
2.1 Type of Registration (left)
3.0 Workspace (center of the main page)
1.0 Menu and Project Selection (top)
1.1 Menu Button
(three lines, top left)
Here you can, among other things:
- Switch Area.
- Synchronize the project (upload/download)
- Go to Support.
- Log out.
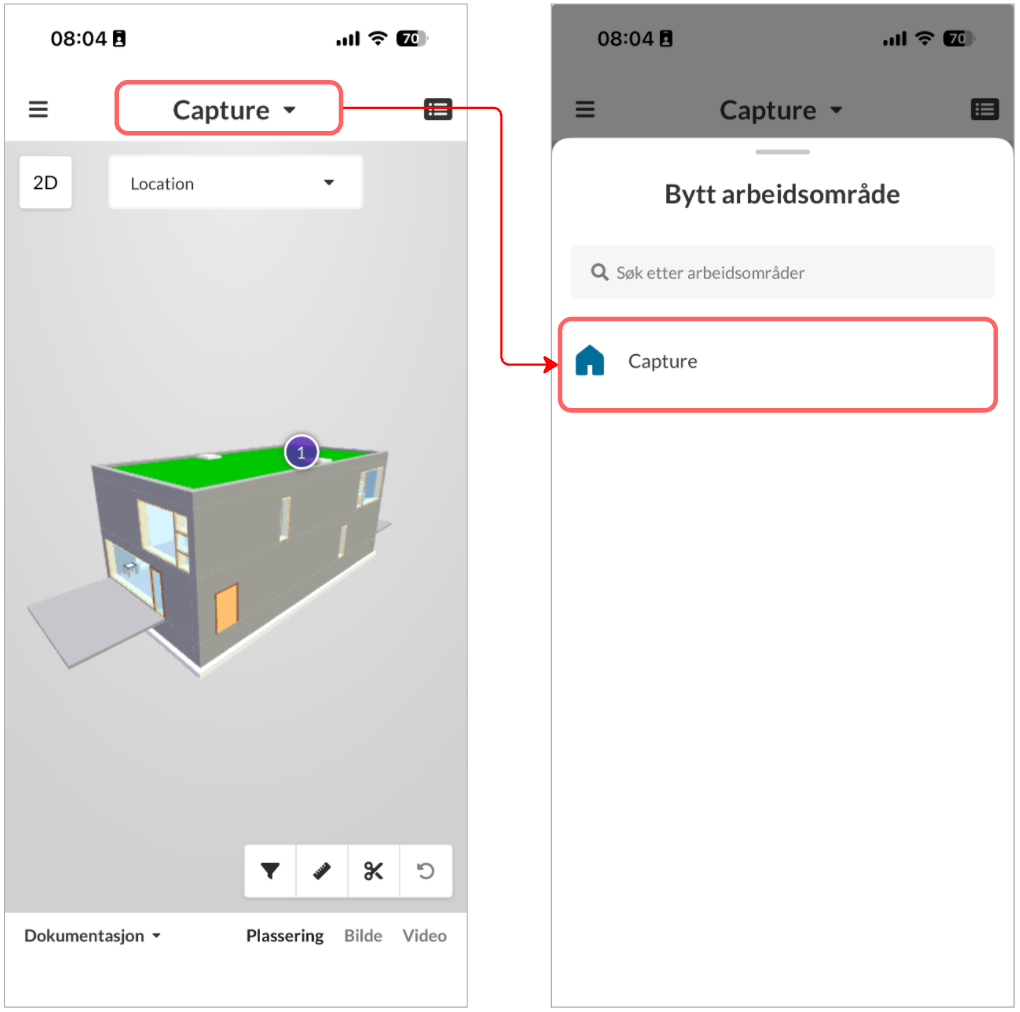
1.2 Project Name
(top center, e.g., “Capture”)
Shows which project you are currently working in.
- Tap the project name to switch to another project/area.
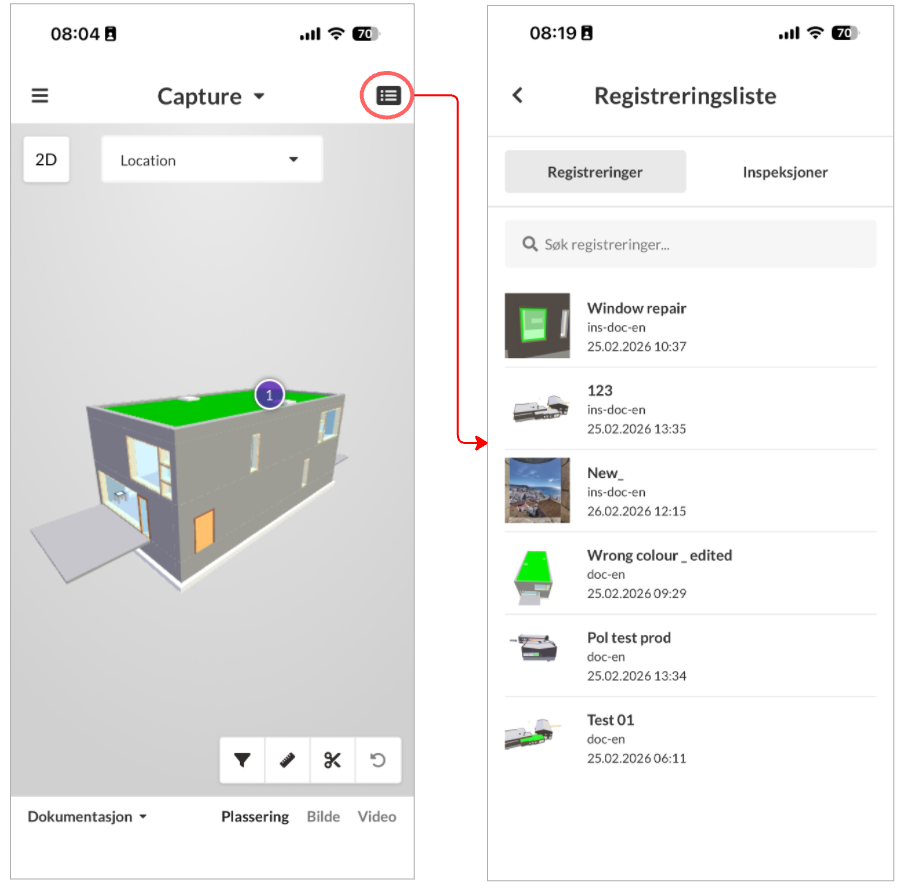
1.3 List View
(icon top right)
Opens a list view with all registrations created in the project.
Types of registrations will be:
- Documentation.
- Inspection.
Would you like to read more details about how to use the list view? Click here (opens in a new tab)
2.0 Toolbar (bottom)
At the very bottom of the work page, you choose:
- Which type of registration you will work with (left side).
- Which work mode you want to work from (right side).
The display of the workspace is determined based on the view you are in.
2.1 Type of Registration (left)
By default, you work with the documentation process. Tap here to view or select other available processes.
- For now, you can only initiate an
inspection from this option, in addition to the documentation process.
Note: Which processes are available depends on how the project is set up and which project template is used. As of today, only the documentation process is available for single registrations or as part of an inspection.
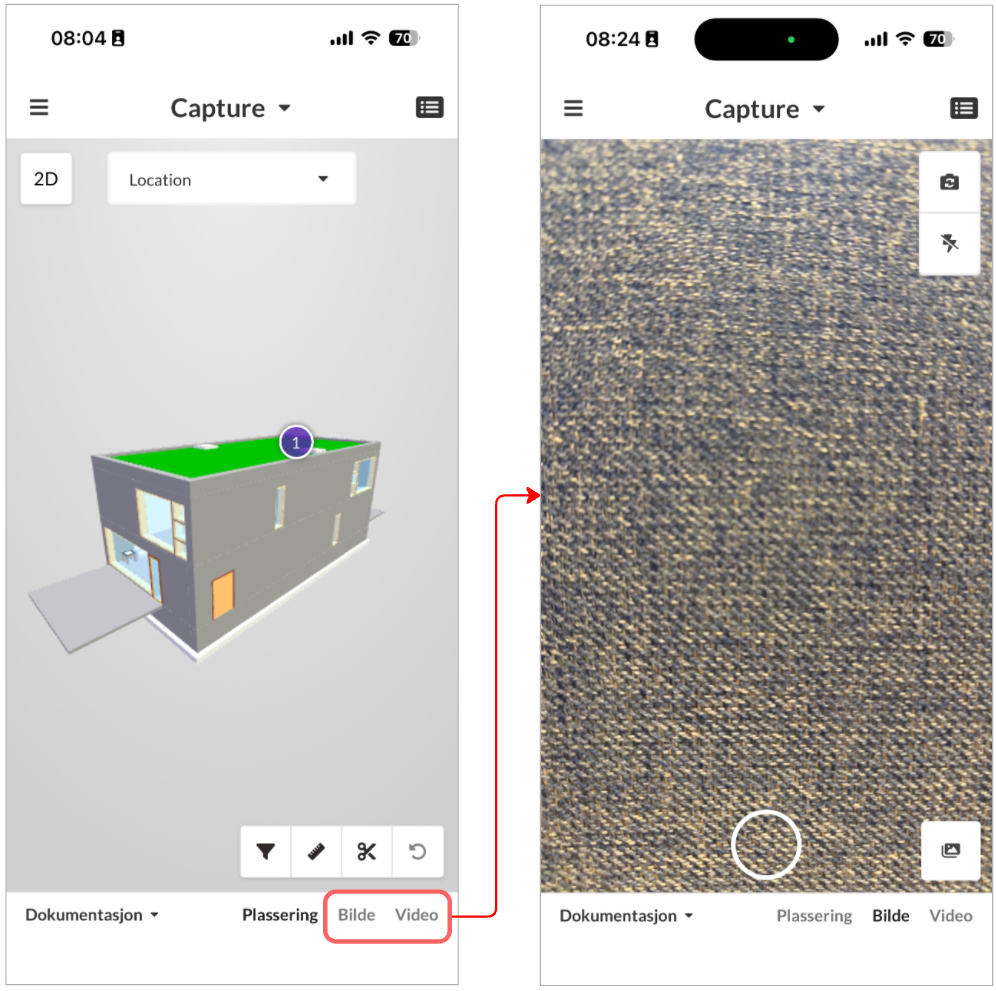
2.2 Work Mode (right)
You can work from the following modes:
- 3D Model – Navigate the model and link registrations to objects in the model.
- Camera – Work with images, take photos, and link them to a registration.
- Video – Record and save video, and link them to a registration.
Note: The selected work mode determines the further workflow for your registrations. Regardless, you link them to a registration that is easy to find later.
3.0 Workspace (center of the main page)
The area in the center of the work page always shows what you are working from, based on the selected work mode:
- In 3D model you see the project's 3D model.
- In Camera you use a camera view to take photos.
- In Video you use a video view to record footage.
For more detailed use of the 3D model, see the separate guide: Click here. (opens in a new tab)
For a step-by-step overview of how to use the camera in registration processes, see the separate guide:
- Click here for the documentation process. (opens in a new tab)
- Click here for the inspection process. (opens in a new tab)
Comments
0 comments
Please sign in to leave a comment.